

Microsoft Forms
Microsoft Forms are part of the Office365 service. You can access Middlebury’s institutional version of this at http://go.middlebury.edu/o365. When creating Microsoft Forms for use at Middlebury, you should always use your institutional account, never a personal Office account or one provided by another institution.
Our documentation will focus on areas of the Microsoft Forms service that are advanced or unique to Middlebury. To learn about the general use of Microsoft Forms, please see one of these resources.
- Microsoft Forms Quick Start
- Microsoft Forms Help and Learning
- LinkedIn Learning Microsoft Forms video tutorial. Click the Log In link in the top right and enter your Middlebury email address to access this resource.
My Forms versus Group Forms
When you go to create a new form you will have the option to choose whether to create a form as an individual or as the member of a group.
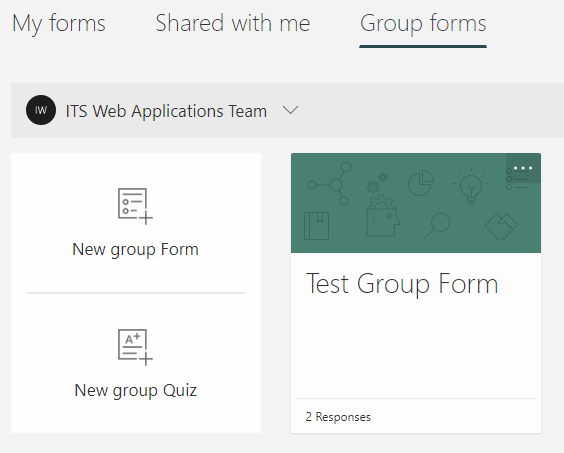
If you use the “My forms” option, the form is tied to your individual account. If you decide to receive notifications when the form is submitted, these will only be sent to you, even if you share collaboration access with other people.
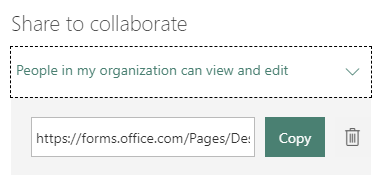
Additionally, with “My forms”, you can share access to edit the form and view submissions by clicking on the Share button and getting a link from the Share to collaborate option, but this creates a link that anyone with a Middlebury account can access. The link format is long and obscure, but once you share it with someone you cannot control who they share it with. We recommend that you use the Group form option or Google Forms if you need to allow more than one person to edit the form or view responses.
The “Group forms” option will automatically share collaboration with all members of the group. If you choose to enable notifications to be sent when the form is submitted, these will be sent to the group’s email. However, in order for this to work, you must log into Outlook, select the Group, Edit it and check the “Let people outside the organization email the group”. As this option allows anyone, not just the forms service, to email the group, consider carefully whether you want to allow this.
With either the “My forms” or “Group forms” option, you can work around these notification restrictions using the advanced email routing explained later in the email section of this documentation, but it takes work to set up.

Managing Access to Submit the Form
Microsoft Forms allows you to restrict your form so that only people with Middlebury accounts can submit the form. If you need to further restrict form submissions so that only particular Middlebury individuals or groups can submit the form please contact ITS to discuss your form in more detail. Include a link to your existing form or a PDF copy of the form you would like to create.
Keep in mind that if you set the restriction that any Middlebury account can submit the form, those submissions will be tracked and we can assist in the event that an individual abuses the form submission process.
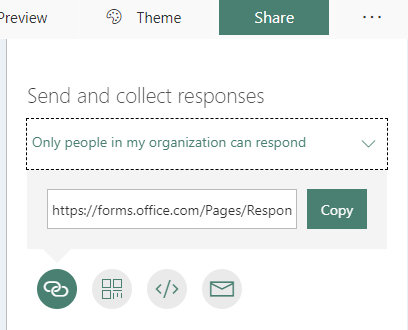
To restrict access so that only people with Middlebury accounts can submit the form, click the Share button in the top right, then select the “Only people in my organization can respond” option.
Email Notifications
To receive email notifications to your individual email account (if your created this using “My forms”) or your group account (if you created this using “Group forms”), click the “…” button in the top right while editing your form and check the “Get email notification of each response” checkbox.
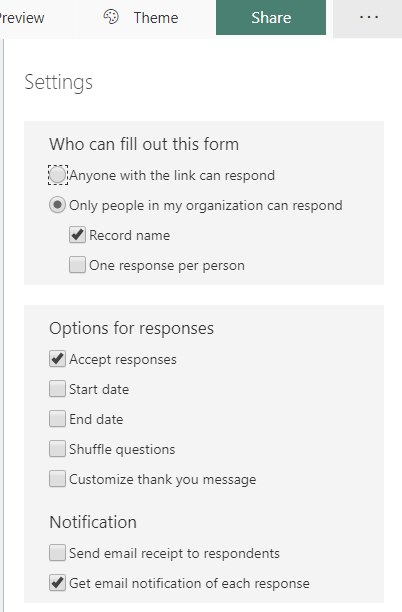
If you created the form as a “Group form”, in order for this to work, you must log into Outlook, select the Group, Edit it and check the “Let people outside the organization email the group”. As this option allows anyone, not just the forms service, to email the group, consider carefully whether you want to allow this.
An alternative to this option can be found in the Advanced Email Configuration section below.
Advanced Email Configuration
By integrating with Microsoft Power Automate (formerly known as Microsoft Flow), you can choose to send form notification emails to multiple email addresses, include form field data in the emails, and decide which accounts receive email notifications based on answers provided in the form.
To access Microsoft Power Automate, click the nine dots button in the top left of the page and choose the “All apps” option, then select “Power Automate” from the list.
Power Automate Templates
Microsoft Power Automate includes a template marketplace of pre-built enhancements for forms and other applications. Unless a Power Automate template is mentioned in this documentation, we have not reviewed it and do not support its use. While you may choose to use Power Automate templates with your form, we strongly recommend that you review the documentation about what the template will be able to access. If you run into an issue that you believe requires using a template not mentioned in this documentation, please contact ITS to discuss your form.
Email Notifications
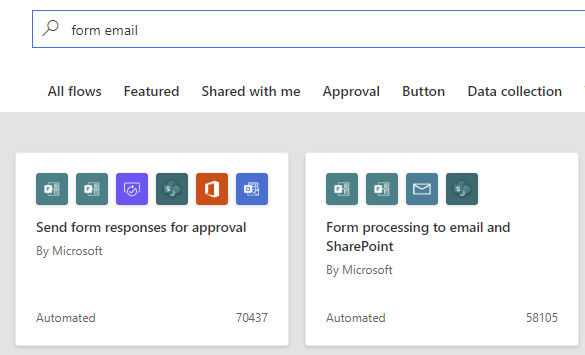
In the search box, type “form email” and choose “Form processing to email and SharePoint” by Microsoft.
Click the Continue button after reviewing the information on the page.
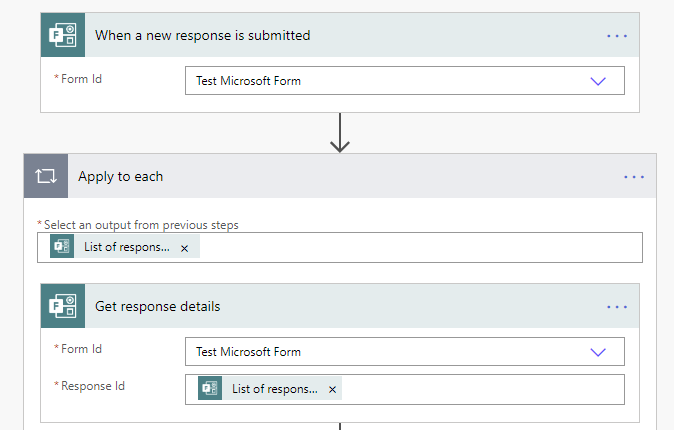
In the first two sections of this form, select your form from the list in the “Form Id” dialog of both the “When a new response is submitted” and the “Get response details” boxes.
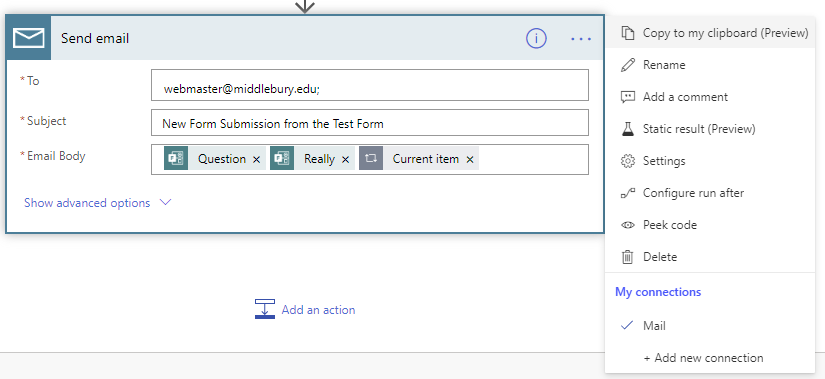
In the Send email box, enter each of the addresses you want to send to in the “To” box and the “Subject” line of the email you want to use. Note that if you click in the Subject box you can choose to include answers from the form in the subject line. Next, in the “Email Body” section, include the fields from the form that you want sent in the email. You can add <br> in the message body in any place where you would like to have a line break.
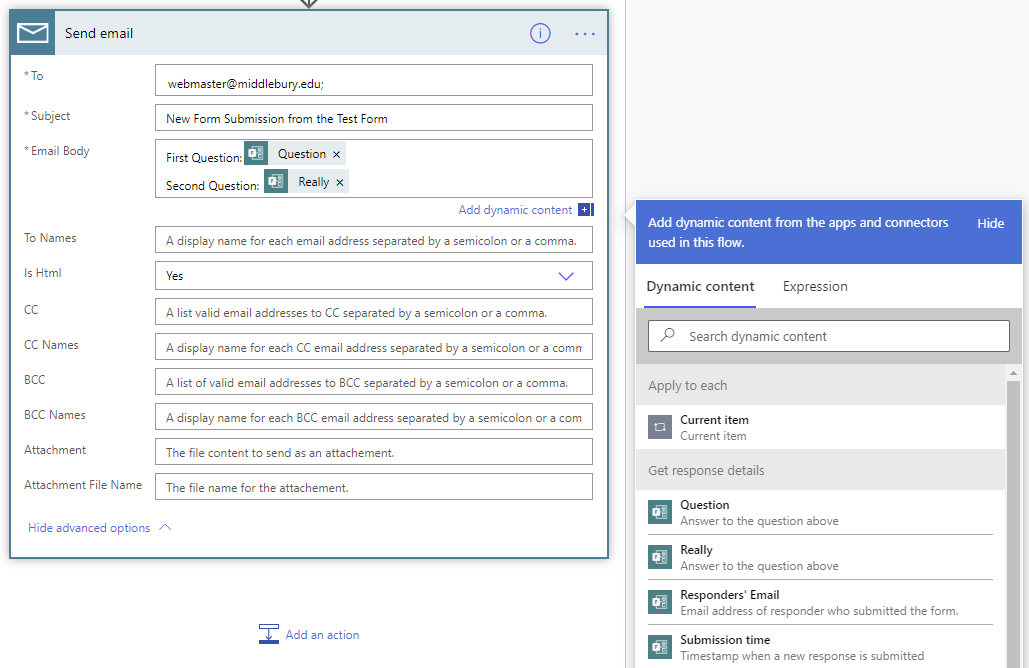
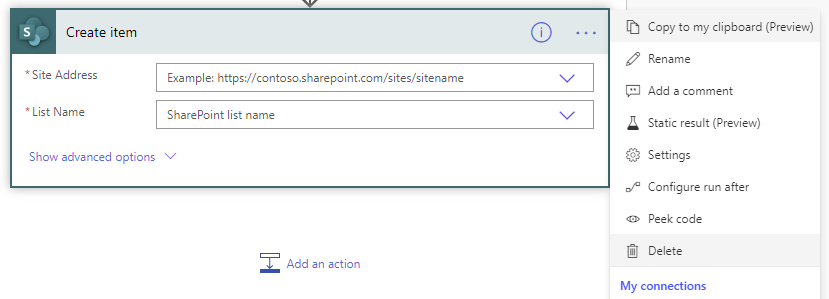
At the bottom of the form, click the “…” on the SharePoint item and click Delete. You can leave this and configure it if you do want to set up a SharePoint site to record responses, but it’s not something that you’ll typically need to do for your forms.
Click the Save button to finish your email notification configuration.
Conditional Emails
You can expand the email notification configuration you set up above to send email based on conditions in the form. To do this, click the plus icon that appears when you hover over the arrow below “Get response details”, click “Add an action” and choose “Condition”.

Choose one or more if your fields to key on for the condition and enter a response value.
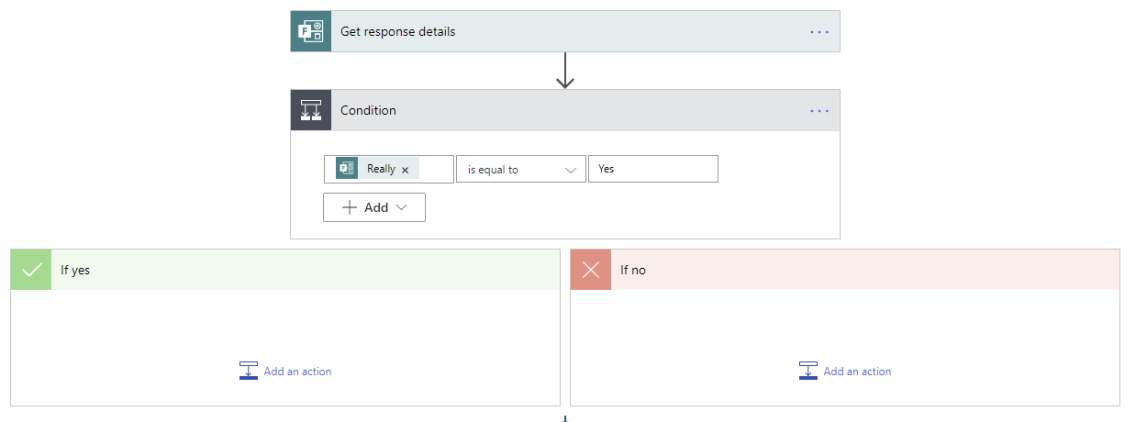
Click the “…” icon in the Send email box and select “Copy to my clipboard”.
In the “If yes” dialog, click “Add an action”, select “My clipboard” and choose the “Send email” action you just copied.

If you want to send an email if the condition is not true, repeat these steps for the “If no” option. You can add other conditions if you want. If you wish to retain your earlier email notification settings and hve those emails sent no matter what the result of the condition(s) you added, click Save, otherwise click the “…” icon in your original “Send email” action and click “Delete”.
Embedding Microsoft Forms
Microsoft Forms can be embedded in Middlebury’s instances of Drupal 7 (www.middlebury.edu pages with a dark blue background), Drupal 8 (www.middlebury.edu pages with a white background), and WordPress (sites.middlebury.edu or sites.miis.edu), provided that they allow anonymous form submissions. If your form requires respondents to log in, you should link to it from these services, rather than embedding the form.
Getting the Embed URL
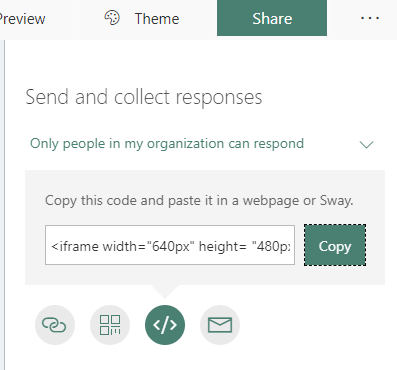
While editing your Microsoft Form, click the Share button and then click the “</>” button. Click the Copy button to copy the embed code. You will need to get the URL from the embed code.
Paste the embed code that you copied into a text editor. It will look something like this:
<iframe width=”640px” height= “480px” src= “https://forms.office.com/Pages/ResponsePage.aspx?id=GQq7oXYVHUK-k7On1Lb…” frameborder= “0” marginwidth= “0” marginheight= “0” style= “border: none; max-width:100%; max-height:100vh” allowfullscreen webkitallowfullscreen mozallowfullscreen msallowfullscreen> </iframe>
Select and copy the URL. It is the portion of the embed code between the src=””. It will look something like this:
https://forms.office.com/Pages/ResponsePage.aspx?id=GQq7oXYVHUK-k7On1Lb…
Drupal
- Go to the page where you would like to embed the form and click the Site Editor Log-in link in the footer.
- Click the Edit page tab in the editing bar at the top of the page and click Edit.
- Add a new Embed component to the page.
- In the URL field, paste the URL you obtained from the instructions above.
- The width and height are the values shown in Microsoft’s Share form dialog.
- Click the Save button.
WordPress
- Log in to your WordPress site and choose Plugins from the options in the left navigation bar of your site dashboard.
- Under Middlebury iframe, click Activate.
- Click Posts or Pages in the left navigation bar of your site dashboard, depending on which you want to embed the form in. Find the individual Post or Page in the list and click the Edit link below it.
- In a text block, enter the following where URL is the URL you obtained from the instructions above and the width and height values are those shown in Microsoft’s embed dialog:
[iframe src=”URL” width=”123” height=”456”]